venerdì 17 aprile 2015

Funny Food Friday: Pankeball!

Ciao a tutti!
Oggi una ricotta facile e veloce per il Funny Food Friday.
Tutto quello di cui avete bisogno è:
-pancake
-una mela o una banana
-fragole
-Nutella  o simili
Ho preparato un pancake grande e rotondo con un mix per pancake e l’aggiunta di latte, burro e 1 uovo.
Ho ricoperto il pancake con la Nutella.
Ho tagliato la mela e le fragole in fettine sottilissime. Ho ricoperto la parte superiore del pancake con le fragole e la parte inferiore con la mela, lasciando una striscia orizzontale ed un cerchio al centro senza frutta.
Poi ho aggiunto un pezzettino di mela tondo per coprire la parte circolare centrale e … tada-----!
Una pokeball perfetta per i fan dei Pokemon, o meglio, una pankeball!!!
Buon divertimento!
ciaociao


Hi everyone!
A super easy and fast recipe for today’s Funny Food Friday.
All you need is:
-pancake
-apple or banana
-strawberries
-Nutella or other chocolate cream
I made a big circular pancake with a pancake mix plus milk, butter and 1 egg.
Then I covered the pancake with Nutella.
I cut the strawberry and the apple un tiny slices. I covered the upper part with the strawberries and the lower part with the apple, leaving an horizontal strip uncovered in the middle with an uncovered circle at the centre . Then I added a round piece of apple in the circle I left uncovered and … tada-----!
A perfect pokeball for Pokemon fans, or better, a pankeball!!!
Enjoy!

ciaociao

venerdì 10 aprile 2015

Funny Food Friday: la signora scompigliata - the ruffled lady

Ciao a tutti!
Pronti per il Funny Food Friday?
Questo ce vi presento è un pasto che ho fatto qualche giorno fa per cena. Il pargolo era affamato e mi ha detto che voleva sia gli spaghetti che un hamburger che abbiamo trovato al supermercato e che non avevamo mai provato prima: l’hamburger di coniglio.
Gli ingredienti che ho usato sono:
-spaghetti
-burro di soia
-hamburger di coniglio
-due fettine piccolissime di formaggio (qualsiasi formaggio vi piaccia)
-10 rettangolini e 2 cerchietti di alga nori
-un pezzetto di carota
-maionese
-2 fettine di cetriolini sottaceto (ma potete usare anche le olive)
Ho fatto bollire l’acqua, ho buttato dentro il sale e gli spaghetti e ho lasciato cuocere.
Intanto ho preparato l’hamburger in una padella con un filo d’olio evo, sale e pepe.
Ho tagliato l’alga nori ed anche la carota dandole la forma di una bocca sorridente.
Quando sia la pasta che l’hamburger erano pronti, ho scolato la pasta e l’ho condita con un pochino di burro di soia (ovviamente potete usare il burro normale ed aggiungere un po’ di Parmigiano) perché volevo stare sul semplice e leggero.
Ho messo l’hamburger al centro del piatto e ho aggiunto intorno gli spaghetti per creare i capelli. Poi ho aggiunto i cerchietti di formaggio all’hamburger, poi sopra il cetriolo e i cerchietti di alga nori. Poi ho messo le ciglia di alga. Ho aggiunto anche la bocca di carota e un puntino di maionese per il naso.
Fatto!
Magari non è perfetto, ma l’ho fatto con quello che avevo in casa al momento, ed è proprio questo l’obiettivo in fondo.
Non deve essere perfetto, deve essere divertente!
Al pargolo è piaciuto perché in effetti questa faccia è abbastanza buffa!
Provatelo anche voi e gustatevelo!
A presto,
ciaociao


Hi everyone!
Ready for the Funny Food Friday?
This is a meal I prepared a few days ago for dinner. The kid was hungry and said he wanted spaghetti and the hamburger we found at the supermarket and never tried before: rabbit meat hamburger.
The ingredients I used are:
-spaghetti
-soy butter
-rabbit hamburger
-two little round slices of cheese (any cheese you like)
-10 small rectangular pieces and 2 small round pieces of nori sheet
-a small piece of carrot
-mayonnaise
-2 small slices of pickles (but you can use olives)
I brought the water to a boil in the pot, added some cooking salt and the spaghetti and let it cook until done.
Meanwhile I cooked the hamburger in a pan with just a little bit of oil, salt and pepper.
I cut the nori sheet and also the carrot giving it a shape of a smiling mouth.
When both pasta and hamburger were ready, I flavored the pasta with a little bit of soy butter (you can also use regular butter and you can add some Parmesan cheese) because I wanted to keep it simple and light.
I put the hamburger in the centre of the plate and added the spaghetti all around to make the hair. Then I added the cheese, the pickles and the round nori on the hamburger for the eyes. I also added the other nori to create the cilia. I also put the carrot smiling mouth and a little of mayonnaise in the centre for the nose.
Done!
Maybe it’s not perfect but I did it with what I had in the kitchen at the moment, and that’s the purpose.
It doesn’t have to be perfect, it has to be fun!
The kid really liked it because the face was actually funny!
Try it and enjoy!
See you soon,

ciaociao

lunedì 6 aprile 2015

Pasqua tra conigli e torte dell'orto - an Easter with bunnies and garden cakes

Un po’ tardi, ma siamo qui per parlarvi del nostro pranzo di Pasqua.

Ogni anno io e il pargolo andiamo a casa dei  miei genitori a festeggiare la Pasqua con loro e mia sorella.
Ogni anno arriviamo presto per decorare la sala da pranzo (potete vedere la stanza decorata per Pasqua nel mio post precedente qui).
Quest’anno ho preparato anche una speciale torta al cioccolato e dei biscotti.
Partiamo dai biscotti.

Uso sempre la stessa ricetta per i biscotti perché è facile e super veloce:
1 uovo intero
2 tuorli
300 gr. farina
100 gr burro
100 gr zucchero
½ bustina lievito per dolci
Cuocere a 160°
Ho ricavato dei biscotti rotondi grandi per il sedere del coniglio e alcuni più piccoli ovali per le zampe.
Quando sono ancora caldi bisogna mettere la glassa all’acqua (fatta con 100 gr. Di zucchero a velo e 2 cucchiai di acqua bollente): io l’ho colorata con colorante alimentare rosso per farla rosa.
Quando è asciugata ho aggiunto la coda e la parte inferiore dei piedi con la ghiaccia rele.
Fatto! Ci vuole solo un pochino per decorare, ma ne vale la pena. È stata la mia prima volta con la glassa all’acqua e con la ghiaccia reale, ma non mi sono usciti male!!! Mi ci è voluto solo un attimo all’inizio per capire come farli bene.


Ho preparato anche dei biscotti con gli stessi colori invertiti: glassa bianca e ghiaccia reale rosa. Entrambe le versioni sono venute bene e sono state apprezzate!
Poi ho preparato un plum cake al cioccolato. Va bene qualsiasi ricetta abbiate, l’importante è che risulti abbastanza alto. Lo volevo alto perché ci dovevo infilare dei biscotti fatti a carota.
Ho preparato il plum cake e quando era pronto ho iniziato a preparare la farcia. Per questa torta ho provato una farcitura nuova: 100 gr di cioccolato fondente fuso con 125 gr di tofu morbido (io in realtà ho raddoppiato la dose perché ho riempito due strati e l’ho completamente ricoperto). Mischia tutto con lo sbattitore elettrico finché non diventa una crema.

Poi ho preparato 3 biscotti a forma di carota utilizzando degli utensili da cucina a forma di cono e li ho cotti in forno. Ho anche preparato 3 “coperchi” per la parte superiori dei coni/carote. Ho fatto un buco al centro di ogni coperchio per metterci dopo le foglie di cioccolato delle carote.
Poi ho fatto sciogliere del cioccolato bianco e una parte l’ho colorata di arancione con il colorante e una parte l’ho resa verde con la polvere matcha.
Poi ho ricoperto i coni/carote di cioccolato arancione e li ho lasciati raffreddare. Ho disegnato delle foglie per le carote con il cioccolato verde su un pezzo di carta da forno e l’ho messo a indurire in frigorifero.
Quando i biscotti carote erano pronti li ho riempiti di crema al cioccolato e tofu e li ho chiusi sigillando cono e coperchio con del cioccolato
Poi ho tagliato la torta in tre strati e ho spalmato a crema di tofu e l’ho anche ricoperta della stessa crema. Poi ho fatto tre buchi nella torta e ci ho messo le tre carote di biscotto. Infine ho infilato le foglie di cioccolato nei buchi in alto.


Ho messo la torta in un recinto di legno (comprato da Tiger)con della carta da forno intorno e ho sparso sopra un po’ di briciole di biscotti al cioccolato per farla sembrare di più come la terra. Ed ecco la torta dell’orto!
È stato divertente preparala ed è piaciuta a tutti.
L’unico problema è stato che non ho detto a mia madre che avrei portato il dolce perché in realtà non sapevo se avrei fatto in tempo a prepararlo. Così mia madre ha preparato 2 torte. Poi è arrivata mia sorella, che prima di arrivare a casa è passata in una pasticceria e ha comprato 2 vassoi di paste!!! Troppi zuccheri!!! Ahahah!


Ma prima del dessert siamo usciti in giardino per la caccia alle uova: il pargolo ne ha trovate 13 piccole con dentro degli ovetti di cioccolata, 3 medie con dentro ovetti di cioccolata e monete, 8 a pois con dentro ovetti e monete. Dentro a uno di quelli a pois c’era un pezzo di carta per iniziare la caccia alle uova di cioccolato grandi: ha trovato 3 uova di cioccolato, un pacchetto a forma di uovo di Pasqua con dentro 3 libri e infine un grande scatolone che gli ha mandato suo padre con tanti giochi, vestiti e snack.
Era felicissimo!!!


Il tempo non è stato un granché, ma è stata una bella giornata e il pargolo ne è stato felice.ùdomani mangeremo ancora dai miei e usciremo a fare un giro e andremo al cinema a vedere Home.
Si preannuncia una bella giornata.
Ma da martedì … DIETA!!! Ahahah!
A presto,
ciaociao


A bit late, but here we are to tell you about our Easter lunch.
Every year  for Easter the kid and I go to my parents’ house to celebrate with them and my sister.
Every year we arrive a bit early to decorate the dining room (you can see the Easter decorated room in my previous post here).
This year I also prepared a special chocolate cake and some biscuits.
Let’s start from the biscuits.
I always use this recipe for the biscuits because it’s easy and super fast:
1 egg
2 egg yolks
flour 300 gr
butter 100 gr
sugar 100 gr
baking powder 8 gr
Bake in the oven at 160°
I cut some round big cookies for the bunny bum and some small ovals for the bunny feet.
When they are still warm you put on the frosting (made with 100gr of powdered sugar and 2 tsp of boiled water): I colored it with some red food coloring to make it pink.
When it dried I added the white royal icing for the tail and the footprints.
Done! It takes a bit to decorate it, but it’s worth it. It was my first time  with the frosting and the royal icing, but it wasn’t that bad!!! It only took a little time at the beginning understand how to do it right.
I also prepared some cookies with inverted colors: white frosting and pink royal icing. Both versions were nice and appreciated!


Then I prepared a chocolate plum cake. You can use any recipe you have, the important point in this case was its height. I wanted it to be quite high because I needed to put some carrot shaped biscuits in it.
I prepared the plum cake and when it was ready I started preparing the stuffing. For this cake I tried out a new stuffing: 100gr of melted dark chocolate with 125gr of silken tofu ( I actually used double the dose because I stuffed two layers and covered all the cake outside). Whisk it with the mixer until it becomes a cream.
I then prepared 3 biscuit carrots using 3 cone tools baking them in the oven. With the 3 cones I prepared 3 sort of covers for the top of the carrots. I made a little hole in each of the 3 covers to place the chocolate carrots leaves then.
I melted some white chocolate and made one orange with the food coloring and some green using matcha.
I covered the cooked carrot biscuits in orange chocolate. I drew the carrots leaves on some baking paper and put into the fridge to harden.
When the carrot cookies were ready I filled them with the choco-tofu cream and “glue” the carrot biscuits and their covers with some melted chocolate.
Then I cut the cake in three layers and filled it with the tofu cream. Then I made 3 holes in the top and put the carrots in the holes. I completed putting the chocolate carrot leaves in the little holes on the top.
I put the cake in a wooden box (with some baking paper around it) and sprinkled some chocolate biscuit crumbs on the top to make it look like dirt. And here it’s my garden cake!
It was fun to prepare it and everybody liked it.
Abbiamo mangiato le lasagne e un arrosto e un pochino di ogni dessert!
The only problem was that I didn’t tell my mom I was bringing some dessert because I wasn’t sure I was gonna make it. So she also prepared 2 cakes. Then my sister arrived, and before coming over she went to a pastry shop and bought 2 trays of pastries!!! Too much sugar!!! Ahahah!
We ate lasagna and roast and the we tasted a little bit of every dessert!


But, before the dessert we went out for the egg hunt: he found 13 little eggs with a chocolate egg inside, 3 medium eggs with 2 chocolates and a coin inside and 8 polka dot eggs with chocolate eggs and coins inside. I one egg he found a piece of paper to start the big chocolate eggs hunt: he found 3 big eggs, a egg shaped box with 3 books inside and, in the end, the big box his father sent with many toys, clothes and snacks.
He was so happy!!!
The weather wasn’t very good but it was a really nice day and the kid was very happy.
Tomorrow we’re eating at my parents again and we’re going out for a walk and then we’ll go to the cinema to see Home.
It’s going to be a nice day.
But from Tuesday…DIET!!! Ahahah!
See you soon

ciaociao

sabato 4 aprile 2015

Bicchiere di plastica? No, cestino! - Plastic glass? No, a basket!

-1 a Pasqua!


Oggi vi mostro un lavoretto super facile che potete fare con i bambini per Pasqua. Ho visto quest’idea su questo blog e ho preso spunto cambiando alcune cose.


Tutto ciò che vi serve è:
-bicchieri di plastica (gialli)
-spugnette (io le avevo gialla, rosa e verde)
-spaghetti
-farfalle
-colori a tempera
-colla
-ovetti di cioccolato


Tagliate e assemblate i bicchieri di plastica come si vede nella foto così da avere alla fine dei piccoli cestini di plastica.


Poi incollate a ogni cestino una striscia di spugna del colore che volete.
Poi noi abbiamo incollato anche un fiorellino fatto sempre di spugna.
Il pargolo ha colorato la pasta con la tempera e abbiamo creato delle farfalle attaccando le farfalle di plastica a pezzetti di spaghetti.
Poi abbiamo incollato le farfalle ai manici e abbiamo aggiunto gli ovetti di cioccolato.
Semplicissimo! Spero proviate a farlo anche voi. Non richiede molto tempo ed è perfetto se siete un po’ “indietro con I lavori”.
A presto,
ciaociao


-1 to Easter!

Today  I’ll show you a super easy craft that you can do for Easter with your kids. I saw this idea on this blog and took the idea while I made some changes.


All you need is:
-(yellow) plastic glasses
-sponge (I had yellow, pink and green)
-spaghetti
-farfalle (butterfly shaped pasta)
-tempera colors
-glue
-chocolate eggs


Cut and fasten the plastic glasses the way you see in the picture so that in the end you’ll have a plastic basket.
Then glue a strip of sponge of the color you prefer to create the handle of the basket.
Then we added a flower also made of sponge.
The kid colored the pasta so that we created some cute butterflies gluing the butterfly pasta and little pieces of spaghetti.
Then we glued the butterfly on the handle and filled the basket with chocolate eggs.
This easy!
Hope you’ll try it out! It doesn’t require much time and it’s perfect if you’re a bit behind your schedule J
See you soon,
ciaociao


venerdì 3 aprile 2015

Funny Food Friday: uovo fruttato ed altre ricette - fruit egg and other recipes

Tra due giorni sarà Pasqua e quindi oggi per il Funny Food Friday presenterò qualcosa a tema J
In two days it will be Easter so for today’s Funny Food Friday we’ll have some themed ideas J


Per primo come colazione si può preparare un pancake a coniglio: è un normalissimo pancake con le parti “disegnate” a formare un coniglio con corpo, testa, orecchie e zampe. Ho farcito la parte del corpo con crema al cioccolato e fragole, mentre ho riempito la testa con la stessa crema e le banane. Per i piedi ho usato due fette di banana e i mirtilli tagliati a metà. Per la coda a pompon la panna montata.


First, for breakfast you could prepare a bunny pancake: it’s just normal pancake shaped as a bunny with body, head, ears and feet. I filled the body with chocolate cream and strawberry and the head with chocolate cream and banana. For the feet I used sliced banana and halved blueberry. The pompon  tail is made of whipped cream.


Ed ecco un’idea per il pranzo: prepara un hamburger (di qualsiasi tipo), un po’ di insalata, carote, pomodoro ed è pronto! Metti l’insalata sul piatto a formare un cerchio e mettici sopra delle carote a forma di fiore (io le ho tagliate con una formina per biscotti). Poi metti al centro il tuo hamburger quando è cotto e mettici sopra due fette di pomodoro ( o due mini hamburger di forma ovale se preferisci) per creare le zamper del coniglio. Poi usa la maionese per creare la coda e rifinire le zampe. Ecco un simpatico “didietro” di coniglio!!! J


Then an idea for lunch: prepare a hamburger (whatever you like), some salad, carrot and tomato and it’s done! Put the salad in your plate making a circle and put some flower shaped carrots on it. Then put in the middle the cooked hamburger. Place two slices of tomato (or, if you prefer, two oval pieces of some other hamburger) on the hamburger to make the feet on a bunny. Then use the mayonnaise to “draw” the tail and the feet. And here you have a funny bunny butt!!! J


Infine vi suggerisco un po’ di frutta. Ho preparato una macedonia in un recipiente aggiungendo zucchero e succo di limone alla frutta tagliata. Poi ho preso un po’ della frutta e ho cercato di disporla a formare un uovo di Pasqua dai diversi colori e fantasie.
Potete usare la frutta che preferite e lasciar fare il resto all’immaginazione per creare un uovo di frutta tutto colorato J


Last I suggest some fruit. I prepared some fruit salad in a bowl adding sugar and lemon juice to all the cut fruits. Then I took some of the fruits and tried to create an Easter egg with different colors and patterns. You can use the fruit you prefer and let your imagination do the job for a very colorful fruit egg J


Spero vi siano spiaciuti questi spunti.
Ci vediamo domani per un piccolo lavoretto pasquale molto semplice e veloce.
ciaociao

Hope you enjoyed these ideas.
See you tomorrow for a quick and easy Easter craft.

ciaociao

mercoledì 1 aprile 2015

Pomodoro d'aprile - April fool's tomato

Ieri io e un’altra mamma ci siamo accordate per portare al parco i nostri figli e il loro amico oggi pomeriggio dopo la scuola, visto che da domani saranno anche a casa da scuola per una settimana per le vacanze di Pasqua.

Ma oggi è il pesce d’aprile … e così ho pensato di fare qualcosa! Eheheh!

Avevo dei pomodorini in casa, così ho comprato 3 Chupa-Chups e ho preparato tre bastoncini da cake pops. Ho tolto con delicatezza l’involucro dei lecca lecca senza romperlo. Poi ho messo i bastoncini nei pomodori e li ho avvolti con la carta dei lecca lecca. Per tenerli chiusi più saldamente ho usato dei mini elastici… e il primo scherzetto eccolo pronto J

Poi ho visto che avevo in casa un mix per fare la gelatina di fragola, così ho pensato di preparare una finta bibita come ne ho viste tante sulle bacheche Pinterest.

Ho messo il mix nell’acqua bollente e ho mischiato bene. Ho versato la gelatina liquida nei bicchieri di plastica e ho messo i bicchieri nel frigorifero per circa 4 ore.
Dopo ho tirato fuori i bicchieri e ho messo una cannuccia in ognuno.
Ho tenuto tutto in frigorifero fino a quando sono uscita per andare a prendere i bambini.

L’altra mamma e io li abbiamo portati al parco e siamo stai fortunati perché c’era un bel sole (anche se c’era il vento).

Dopo che hanno giocato per un paio d’ore, nel tornare a casa ho dato loro qualcosa per rinfrescarsi…eheheh.
Quando hanno visto la bibita e il lecca lecca erano molto contenti ed eccitati, e non sospettavano nulla. Non riuscivano a crederci, avevano delle facce tipo … “ma cosa?”, ma si sono divertiti anche loro e hanno riso degli scherzi!

È stata una sorpresa divertente J
E voi avete fatto niente di divertente oggi?
Raccontateci tutto!

ciaociao


Yesterday me and another mom planned to go to the park with our kids and their friend this afternoon after school because from tomorrow the kids are home from school for Easter vacation for a week.

But today is April fool’s day…so I thought I could do something! Eheheh!

I had some tomatoes at home so I bought 3 Chupa-Chups and prepared also 3 cake pops’ sticks. I gently removed the wrap of the lollipops without breaking it. Then I put the sticks in the tomatoes and used the lollipops wrap to wrap up the tomato pops. To secure it better I used a mini rubber band… and the first prank it’s ready J

Then I noticed I had the mix to prepare a strawberry jelly so I thought to make a fake drink as I saw on many Pinterest boards.

I put the mix in boiling water and mixed well. Then I poured the liquid jelly in the plastic glasses and put them in the fridge for about 4 hours.
After that I took out the glasses and put a straw in each one.
I kept everything in the fridge until I went out to take the kids at school.

The other mom and me brought them to the park and we’ve been lucky because it was a really nice and sunny day (a bit windy though).

After they played for a couple of hours, on the way home I gave them the special treats to refresh them…eheheh.
When they saw the drink and the lollipop they were very happy and excited, and didn’t suspect anything at all. They couldn’t believe what they saw and they were like…”what?” but they enjoyed the pranks and laughed!

It was funny to surprise them J
Have you done anything funny today?
Share it with us!


ciaociao

venerdì 27 marzo 2015

Funny Food Friday: una cena polare - a polar dinner

Ciao a tutti,
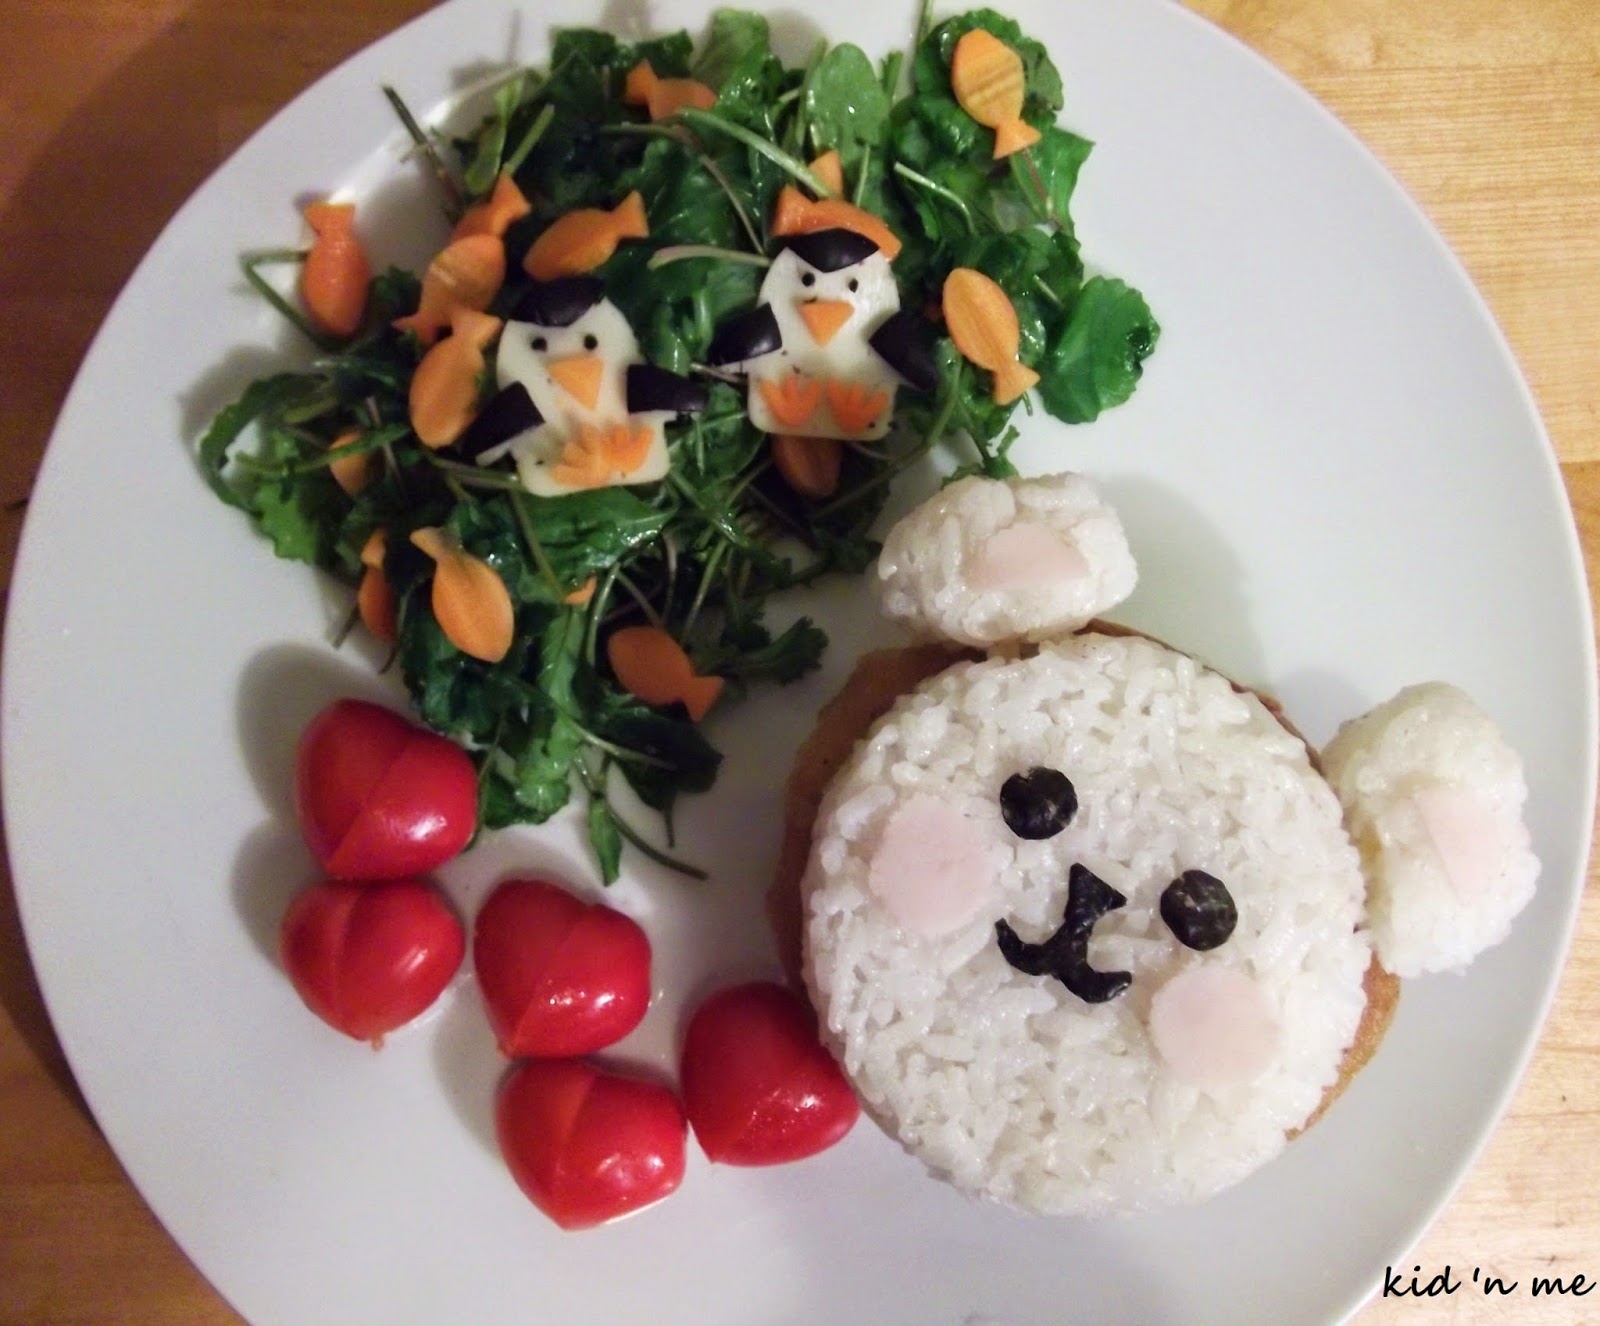
eccoci qui con il nostro Funny Food Friday e … un pranzo/una cena polare!

Ho preparato questa cene questa settimana, anche se ormai è primavera e la temperatura fuori è sempre più calda.
Avevo in casa degli hamburger di pesce e volevo cucinarli, ma non avevo pane. E poi, anche se è strano, a mio figlio non piacciono particolarmente gli hamburger, anche se li mangia.
Ho deciso così di renderlo un po’ speciale e più divertente di un normale hamburger.

Ingredienti:
-hamburger di pesce o di carne
-riso cotto al vapore
-alga nora in fogli
-prosciutto cotto
-insalata
-formaggio a fette
-olive nere
-carota
-pomodorini


Per prima cosa ho preparato il riso al vapore. Quando era pronto ho fatto 2 hamburger di riso rotondi e spessi 1 cm, della misura perfetta per un hamburger. Li ho fatti con un misurino che ho in casa che è proprio di quelle misure. Poi ho spennellato della salsa di soia su 2 lati di un hamburger e su un lato solo dell’altro.
Mentre ho messo a cuocere hamburger di pesce ho messo in un’altra padella gli hamburger di riso con la loro soia. Uno l’ho cotto su due lati, l’altro non l’ho cotto dalla parte dove non c’era la soia perché lo volevo bianco.
Intanto ho tagliato l’alga nori in naso, bocca e occhi di un orso e ho tagliato tre piccoli cerchi di prosciutto. Due li ho lasciati interi e uno l’ho tagliato a metà in modo da avere sue semicerchi.
Ho tagliato un paio di pinguini di formaggio con un tagliabiscotti e con due formine più piccolo ho tagliato dalla carota le zampe e I becchi del pinguino. Poi ho tagliato le olive nere in modo da creare occhi, pinne e testa dei pinguini.
Poi ho tagliato la carota a fette e con una piccola formina ho tagliato tanti pesciolini.
Poi ho tagliato i pomodori datterini a metà in diagonale, ho girato una delle due parti creando dei cuori, che in realtà non hanno nulla a che fare con il Polo, comunque …   Erano carini J
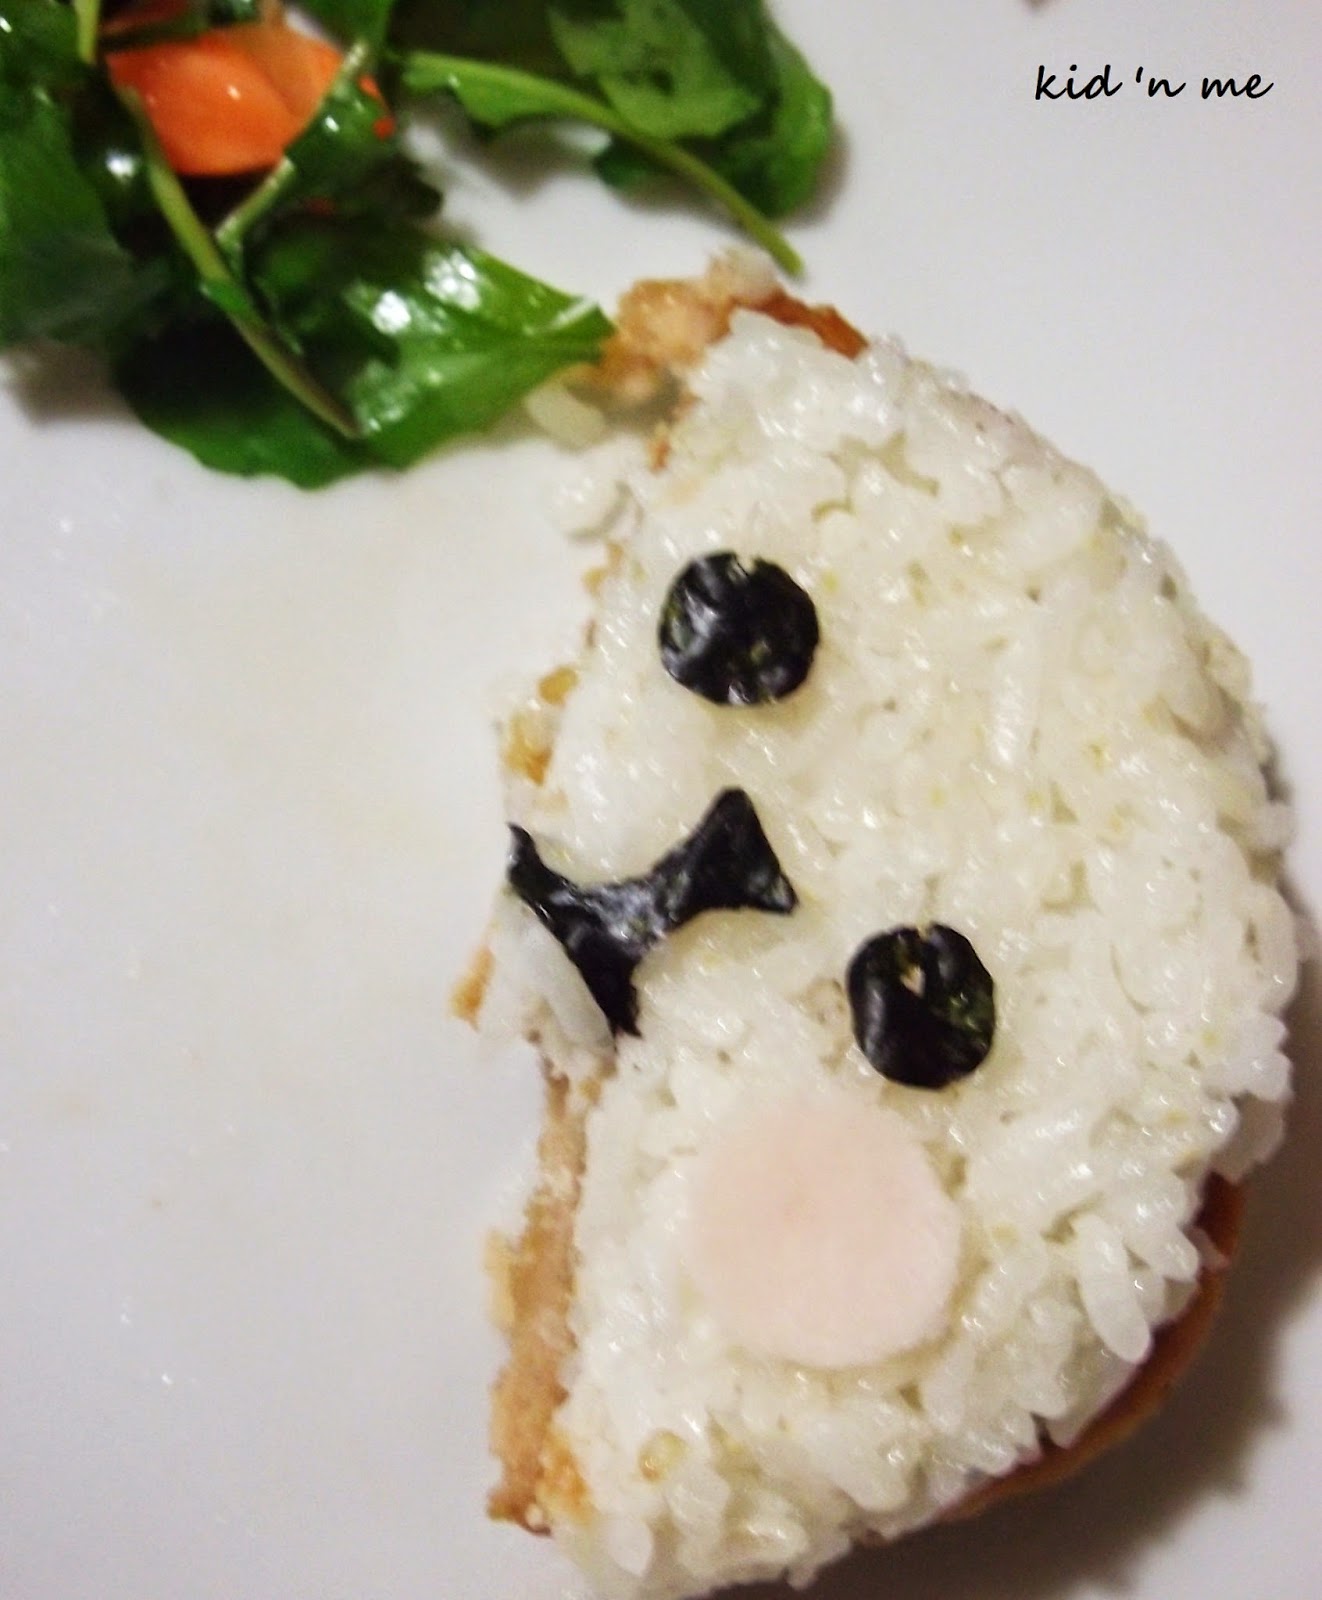
Quando gli hamburger erano pronto ho messo sul piatto l’hamburger di riso e salsa di soia, quello di pesce e sopra l’altro di riso con la parte Bianca rivolta verso l’alto. Ho aggiunto naso bocca e occhi di alga nori e i due cerchietti di prosciutto per le guance.
Poi ho fatto due palline di riso e le ho attaccate alla testa dell’orso con due pezzettini di spaghetti crudi, poi ci ho messo sopra i semicerchi di prosciutto e così ho creato le orecchie dell’orso polare.
HO messo un po’ di insalata sul piatto, e sopra di essa i pesciolini di carota e poi i due pinguini di formaggio.
Alla fine ho messo anche i cuori di pomodoro.


E voilà!
Abbastanza veloce e facile J
E il pargolo era super contento e se l’è gustato molto!
Spero lo proviate anche voi.
A presto,
ciaociao


Hi everyone,
here we are again with our Funny Food Friday and a … polar lunch/dinner!

I made this dinner this week, even though it’s spring and the temperature outside is getting warm.
I had this fish burger that I wanted to cook, but no bread available. And, strange enough, burgers are not the kid favorite food, even though he eats them.
So I thought to characterize it a bit to make it fun.

Ingredients:
-fish or meat burger
-steamed rice
-nori sheets
-ham
-salad
-cheese slice
-black olives
-carrot
-tomatoes


First I made the Japanese steamed rice. When ready I made 2 rice burgers 1 cm thick with a measuring cup that I have that is round and 1cm thick, the perfect size to make a rice hamburger. Then I coated with soy sauce both sides of 1 of the burgers, and I covered in soy sauce only 1 side of the burger left.
While I started cooking the fish burger I put in another pan the 2 rice burgers to cook a bit with their soy sauce. I only didn’t cooked the white side of one burger ‘cause I wanted it to keep white.
Meanwhile I cut the nose, the eyes and the mouth of a bear from nori sheet and cut 3 ham circles. I kept 2 circle round and I cut 1 in half to have two semicircles.

I cut with a cookie cutter a couple of penguins out of cheese slice and with two other small cookie cutters I made the feet and the beaks of the penguin out of carrot. Then cut black olives to make the eyes, the head fur and the flippers.
Then I sliced a carrot and with a mini cookie cutter I cut small fishes.
Then I cut the tomatoes in half diagonally, twisted one part and created some hearts, that actually have nothing to do with the Pole, but still…    They were cute J
When the burgers were done I put on the plate the rice burger covered in soy sauce, the fish burger and the other rice burger with the white side on top. I added the nori nose, mouth and eyes and the two ham circles for the cheeks.
Then I made two small little balls of rice and stuck them on the bear head using two small raw spaghetti pieces and placed the ham semicircles on them to create the ears of the polar bear.
I put some salad on the plate and the carrot fishes on it,  then I placed on it also the cheese penguins.
In the end I put the tomato hearts.


And violà!
Quite fast and easy J
And the kid was super happy and enjoyed it a lot!
Hope you’ll try to make it.
See you soon
ciaociao